How to Build with Concrete Blocks in Sloped Yard Areas
Sloped yards can make outdoor projects a lot harder than they should be. Trying to build anything on uneven ground takes extra care, especially if you’re adding weight through stone or block. The tilt of the yard affects not just how materials sit, but how water moves, how stable the structure stays, and how long it all lasts once the weather changes.
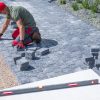
One of the smartest ways we’ve found to handle this challenge is to build with concrete blocks. Whether you’re adding a short retaining wall, steps, or a raised area for planters, concrete blocks can give structure and shape to a space that would otherwise be tricky to use. With the right prep, these blocks hold firm, even when the yard isn’t flat.
Deciding Where and How to Build on a Slope
Before anything gets stacked, it helps to know where to build and why that spot makes sense. Not every part of a sloped yard will work well for blocks. Steep drops, heavy runoff, or loose soil can cause problems, like shifting walls or places that simply don’t drain well.
To figure out the safest and most useful areas, we usually start by walking the yard after a bit of rain. This tells us where water settles, where the ground gives under pressure, or where erosion is already happening. Once we find those spots, we look for areas that meet three key needs:
• Enough accessibility to bring in supplies and tools
• A natural break in the slope for support points
• Stable soil or the chance to shape it into a better base
Spaces that already have some natural ledge or leveling often need less work to shape. For projects like steps or planters, we also think in terms of how the path or planter will connect to high-use areas. Getting that alignment right avoids having to break and redo work later on.
Prepping the Slope Before You Lay Blocks
Once the spot is picked, the next step is making sure the ground can carry the weight. Slopes are harder to prep than flat spaces because loose soil, roots, and uneven runs all need extra attention. We usually start by digging out a trench. This first layer gives us a stable base and room to correct pitch and height.
Compacting the bottom of that trench is one of the steps we never skip. If you don’t, the rows above will settle unevenly over time. That can lead to leaning, shifting, and in some cases, total collapse. Gravel or crushed rock in the trench helps even more by giving water a place to drain instead of soaking into the soil and expanding under the blocks.
These types of prep tasks take patience, but they’re what hold the whole structure together by the time spring rains reach full speed.
Making the First Layer Count
Getting the first row exactly right is the kind of thing that saves a lot of work later. Especially on sloped yards, any twist or dip in the first layer will throw off every block above it.
To stay level, we use a few basics:
• A long spirit level for length-wise accuracy
• A rubber mallet to tap blocks gently until flush
• String lines to guide height and slope
We check every two to three blocks to make sure the line hasn’t drifted. If it has, fixing it early keeps problems from stacking, literally. Keeping the row level takes a little more time on a slope, but it pays off when the top stays straight and the weight holds strong.
Building Up with Stability
Once the first row is locked in, the rest needs to balance strength with water flow. We add gravel or crushed stone behind each row to keep the slope from pressing in too hard. This layer also lets water pass through without building up behind the wall.
For extra strength, we like to stagger blocks. That way, the seam between two blocks doesn’t run straight up. It’s a simple thing, but it makes the wall stronger by spreading out the pressure. When the wall goes above a couple of feet, we start building wider by setting blocks back into the slope. These step-backs add depth, letting gravity do more of the work.
Where the rows touch, we may use construction adhesive between blocks for added grip, especially in small areas like planters or tight curves. But we always wait until we’re happy with the shape before bonding anything in place.
Managing Water and Avoiding Pressure Buildup
Sloped ground almost always means that water is trying to go somewhere. The trick is to keep it from pushing into the back of the block wall. Too much pressure causes cracking, bulging, or leaks that you might not catch until the damage gets worse.
That’s why we make space for water to drain out. Some of the ways we do that include:
• Installing perforated drainpipes behind taller walls
• Adding weep holes in the joints to let water pass through
• Building in gravel-filled channels that direct water where it can be absorbed
Instead of stopping water, the idea is to steer it along a path that won’t break down what you’ve built.
Strong Yards, Even on a Slope
The truth is, working on a slope isn’t easy, but with a solid approach and the right materials, it’s completely doable. Picking out where to build, prepping the slope, and building block by block with the right layers pay off. It protects the structure against movement, water pressure, and wear you might not see right away.
Concrete blocks give you real control over space that would otherwise go unused or wash away over time. When built with care, they hold gardens, create paths, and protect soil from shifting. A sloped yard doesn’t have to be wasted space. With the right start, it can stand strong for years.
When your yard sits on uneven ground, using the right methods and materials can make all the difference. To get the most out of a sloped space, we always recommend careful planning and strong foundations. For anyone ready to shape their outdoor areas with structure and support, take a look at how we help homeowners and contractors build with concrete blocks that last through the seasons. Mr. Pavers has been supplying quality materials for decades, and we know what it takes to handle tough terrain. Give us a call and let’s talk about your next project.