Questioning Garden Stepping Stone Layouts for Sloped Yards
Smoother Paths on Slopes: Rethinking Stepping Stone Layouts
A garden stepping stone path on a slope is never just about looks. On a hill, every stone you place changes how water moves, how safe your footing is, and how your yard holds up over time. In sloped Los Angeles yards, that matters a lot, especially when you are planning late-summer and fall upgrades.
Many paths are built from habit, with a straight line of stones placed in the most obvious spot. That “default” layout often ignores drainage, erosion, and daily use. Here, we want to slow things down, question those defaults, and share ways to plan a stepping stone layout that is safer, more comfortable, and better looking, using materials that fit our local hills and soil.
Why Sloped Yards Demand Smarter Path Planning
On flat ground, a garden stepping stone path can be pretty forgiving. On a slope, gravity is in charge. Water moves faster, soil shifts more easily, and any weak point in a path shows up quickly.
On a hill, you have to think about how:
- Runoff flows during watering or rain
- Soil erodes around and under each stone
- Feet naturally choose the easiest route up and down
Those smooth, straight “magazine” paths usually do not match real life. In many Los Angeles yards, you have:
- Mixed grades, where part of the yard is steeper than it first looks
- Wet pockets from drip lines or sprinklers
- Planting beds that push foot traffic to one side
Sun exposure also plays a role. Shady spots can stay damp longer, while full-sun slopes dry out and get dusty. Irrigation zones may keep some areas soft underfoot and others firm. The best layouts follow how people actually move through the yard, not just how the path looks in a photo.
Common Stepping Stone Mistakes on Hillsides
When slopes and stepping stones mix, small layout mistakes can turn into daily annoyances or real hazards. We see a few problems over and over again.
Misaligned or uneven stones are a big one. On a hill, a stone that tilts even a little can feel like it is trying to roll your ankle. Once irrigation runs or a rare summer rain hits, that slope can get slick, and any uneven edge becomes a tripping point.
Spacing is another trouble spot. On flat ground, wide spacing might just feel awkward. On a slope, stones that are too far apart push people to stretch their stride while also climbing. That throws off balance and makes slips more likely. Stepping stones that are not leveled into the slope can rock underfoot, which is even worse.
Common layout and base issues include:
- Stones set below grade so water pools on or around them
- No compacted gravel under each stone, so they sink or slide
- Paths that run straight down the steepest part of the hill, turning into water channels
- No side support, so soil washes out along the edges
When a path becomes a mini river, stones start to shift, joints wash out, and shoes end up muddy. Fixing that later is much harder than planning around water flow from the start.
Smarter Layouts for Safety, Comfort, and Curb Appeal
A better garden stepping stone path on a slope starts with the shape of the hill, not with a straight line drawn on a sketch. Instead of marching stones straight up or down, think about working with the natural contour.
Practical layout ideas include:
- Gentle curves that follow the hill and slow down both feet and water
- Short switchbacks on steeper areas instead of one long climb
- Small landings, or wider flat spots, where people can pause or turn
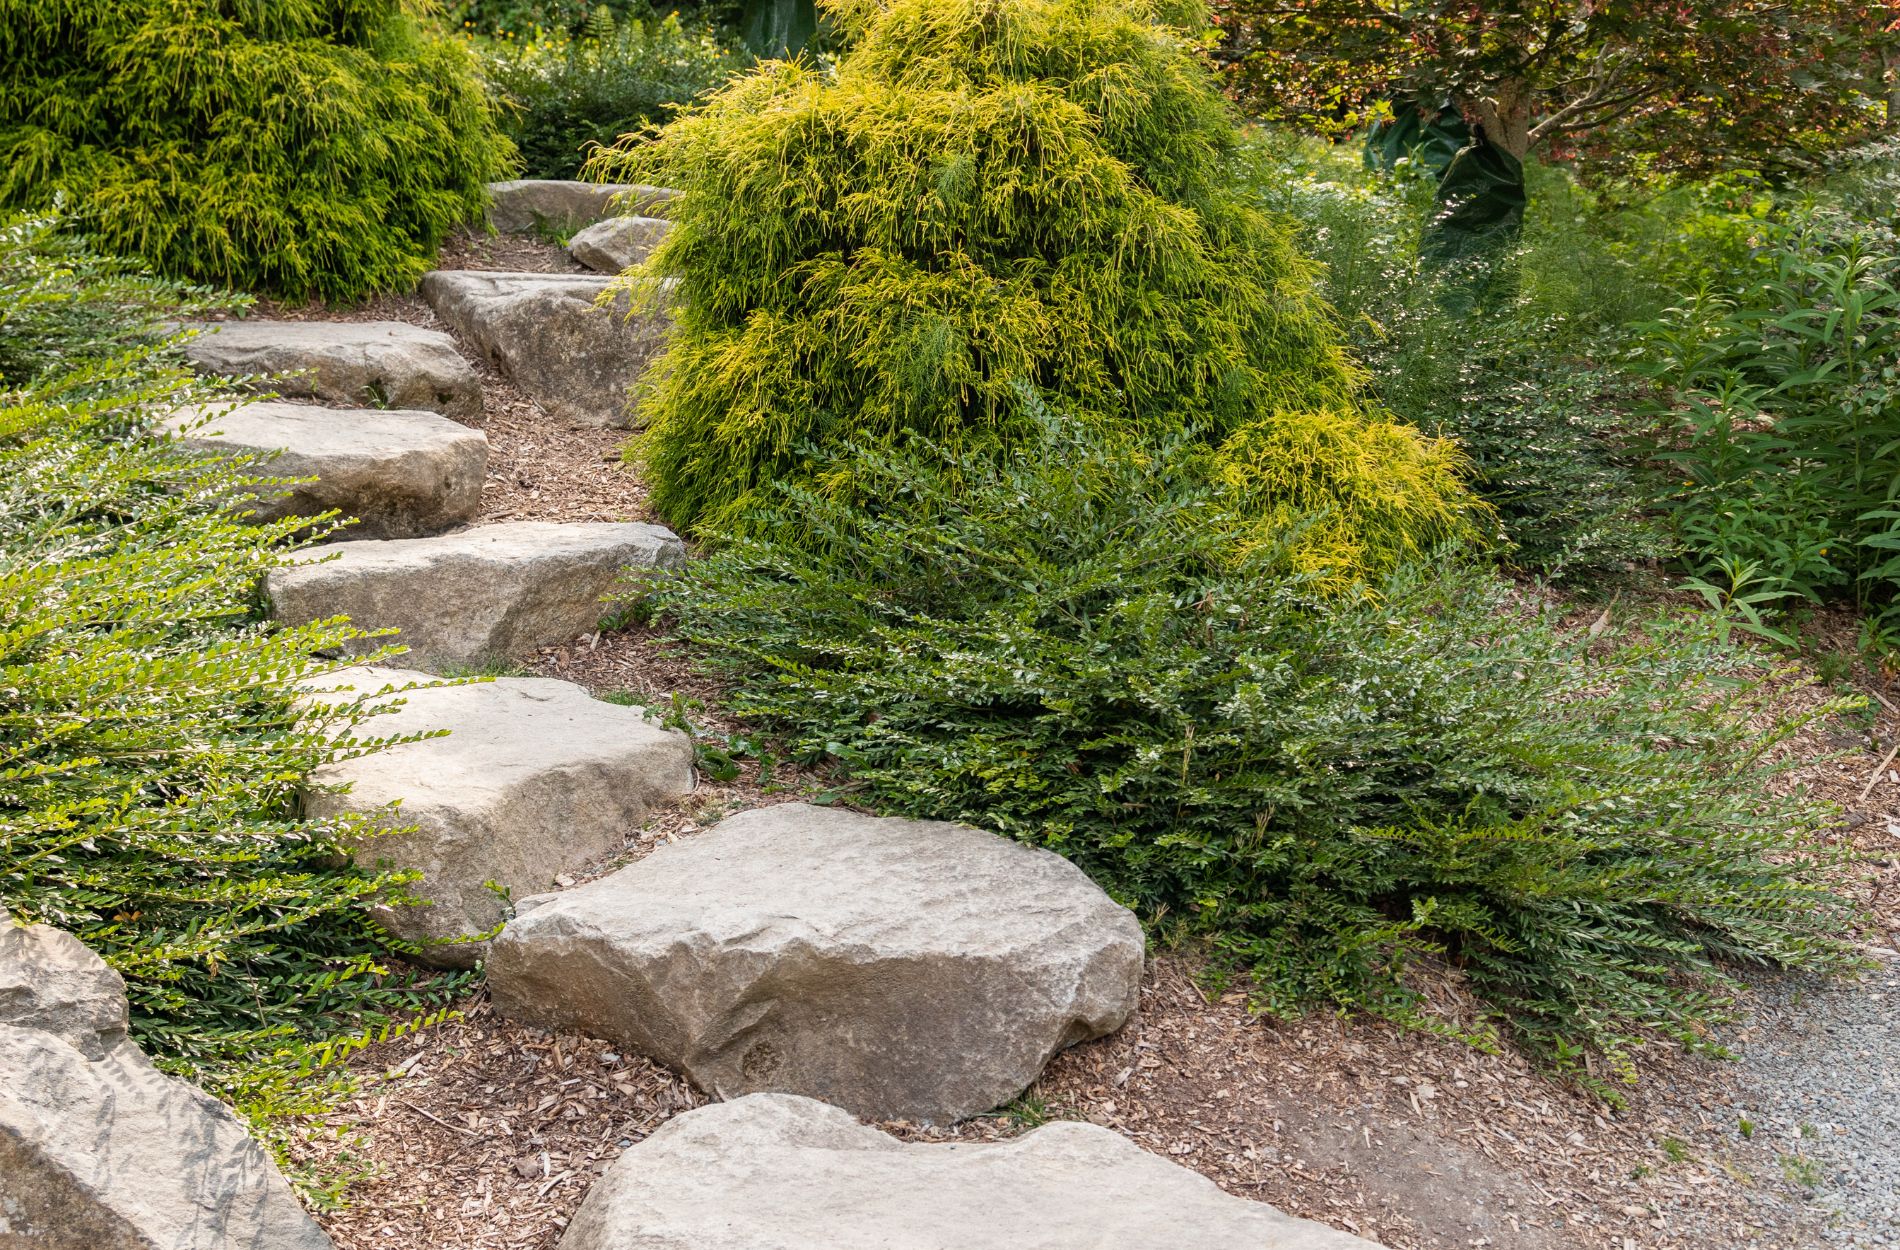
On sharper grades, stepping stone “staircases” can work well. These are stones set like shallow steps, each leveled into the slope with a firm base. You can mix in:
- Wider platforms at doors, gates, or seating areas
- Stone borders to define edges and help hold soil
- Gravel or mulch bands between stones to steady the slope and help with drainage
Style does not have to be sacrificed for safety. You can blend function and curb appeal by:
- Using contrasting pavers at landings or turns so they are easy to see
- Planting low groundcovers between stones where traffic is lighter
- Matching stone color and texture to existing patios, walls, or driveway areas
When layout, structure, and looks all work together, the path feels natural, not forced.
Choosing Materials That Work With Gravity, Not Against It
On a slope, material choice matters just as much as layout. Different garden stepping stone options behave very differently over time.
Concrete pavers have consistent shapes and thickness, which is helpful on hills because they are easier to level as “steps.” Natural stone offers a more organic look, but irregular shapes might need more planning and trimming on steeper grades. Gravel can help with drainage, but on a strong slope it needs proper edging and base layers so it does not migrate downward. Mulch softens the look and is great between stones, but it also wants to move downhill if water is not managed.
Under any stone on a slope, a solid base is key. That usually means:
- A compacted gravel layer to lock each stone in place
- Sand or fine material to help seat the stone firmly
- Stabilization fabric where soil is loose, so the base does not mix into the dirt
Texture matters too. A smoother stone might feel nice barefoot, but it can be slick when wet. A slightly rougher surface often gives better grip on inclines. A local supplier that knows our Los Angeles hills can help match thickness, shape, and finish to your specific grade, soil, and how often the path will be used.
Step Into a Safer, Better-Looking Slope This Season
Late summer is a good time to really walk your yard and question where your garden stepping stone paths should go. Try moving the way you do on a normal day, not just where you think a path should be. Notice where you naturally turn, where you pause, and where you feel off balance.
A simple seasonal plan might look like this: map out the best route now, take rough measurements, then choose materials and arrange delivery as you move toward fall projects. That way, your stepping stones, gravel, mulch, and other supplies are ready to install before the wetter months, and your slope is prepared to handle both daily use and changing light.
When you are ready to plan materials, it helps to bring yard photos, measurements, or sketches to Mr. Pavers. Together, we can look at your slope, talk through traffic patterns, and suggest stone sizes, textures, and layouts that work with gravity instead of letting it work against you.
Get Started With Your Project Today
Transform your outdoor space with a custom path using the perfect garden stepping stone for your design. At Mr. Pavers, we help you choose materials and layouts that complement your plants, patios, and walkways. If you are ready to plan your project or need guidance on next steps, simply contact us and we will walk you through the options.