Los Angeles Garden Path Base Prep: Compaction, Weed Barriers, Drainage
Build a Garden Path Base That Lasts in LA Weather
A clean, solid garden path makes a yard feel finished. It gives you a dry, stable place to walk, keeps dust down, and helps everything look neat. In Los Angeles, paths also have to handle hot sun, long dry spells, and those rare, heavy rains that show up fast and hard.
The secret is not just the top material you see. The real strength is in the layers underneath. In this guide, we walk through three big pieces that matter for DIY garden paths in LA: compacting the soil, choosing smart weed barriers, and building drainage layers that can handle local storms and clay-heavy soils. Fall is a great time to do this work, because days are still bright, the soil is easier to shape, and your base has time to settle before the first big rain.
Plan Your Garden Path Layout and Materials
Before anyone picks up a shovel, it helps to be clear about what this path needs to do. A narrow footpath to a side gate is very different from a wider route where you will push carts or wheelbarrows.
Think about:
- How much traffic will it get, light walking or frequent hauling?
- How wide should it be so two people can pass without stepping into plants?
- How smooth does it need to feel underfoot?
Those answers help you choose garden path materials like pavers, decorative gravel, stepping stones, or decomposed granite. Heavier use usually calls for a deeper base and tighter surfaces like pavers. Light, casual paths might do fine with gravel or DG.
Next, walk your yard and look at conditions:
- Sun or shade along the route
- Roots from trees and shrubs you want to protect
- Any slopes or low spots where water already collects
- How water moves after one of those strong LA rain bursts
You do not want your new path acting like a gutter that rushes water toward the house or patio. Sketch the route on paper, then mark it in the yard with a garden hose, spray paint, or stakes and string. Measure the total length and width.
From there, you can figure out how much base rock, sand, and surface material you will need. Many local suppliers can help estimate volume when you share your measurements and chosen material.
Prepare and Compact the Native Soil Base
Once the layout is set, it is time to open up the ground. Strip away any sod, mulch, and plant roots in the path area, and remove rocks, chunks of old concrete, and buried debris. You are creating space for the full stack: compacted soil, base rock, bedding sand for pavers or stone, and the final surface.
Keep your excavation depth consistent along the full run. A simple way is to set a reference height at doorways or patios, then work backward so the finished surface meets that height without trip edges. Account for each layer when you plan your depth.
Soil compaction is where many DIY paths fall short. Los Angeles yards often have clay or decomposed granite soils that swell when wet and shrink when dry. If they are not compacted well, paths can settle in patches, leaving dips and loose stones.
A few key points for compaction:
- Slightly moist soil compacts better than dry dust or mud
- Work in thin layers, compacting each one before adding more
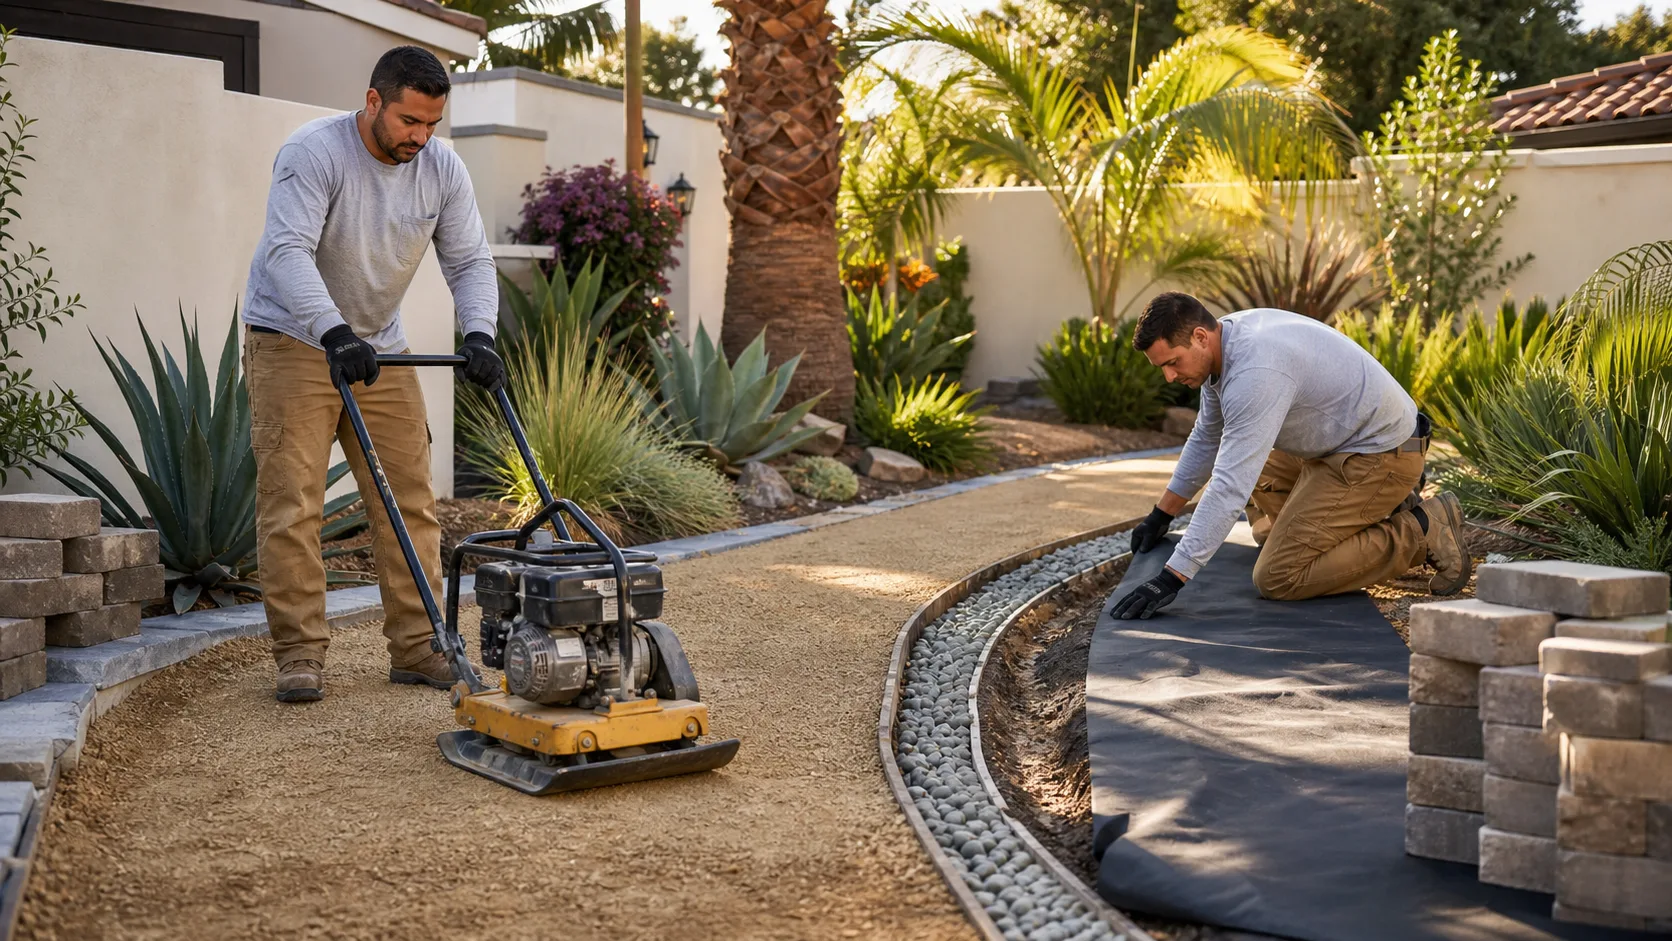
- Use a hand tamper for short or tight paths, or a plate compactor for longer runs
Aim for a firm, smooth, and gently sloped subgrade that sheds water away from buildings. Before moving on, check:
- No soft spots underfoot
- No loose soil that crumbles easily
- No standing water in low pockets
If you find any of these, fix them now. It is much easier to correct a problem at the soil level than to repair a path later.
Install Smart Weed Barriers Without Trapping Water
Weed control is always on homeowners’ minds, but in our climate, water movement is just as important. Solid plastic under garden path materials might sound like a strong barrier, but it often traps moisture in the soil. That can lead to poor airflow and messy edges when water looks for another way out.
You have three common options:
- No barrier at all, just good depth of base and surface
- Landscape fabric that lets water through
- Compacted DG used as a “living” barrier layer under some paths
Landscape fabric is a popular middle ground. For most paths, pick a contractor-grade fabric that resists tearing when you shovel or rake on top. For paver or stone paths, you may use fabric below the base rock to separate soil from rock, which helps keep the base cleaner.
Good install habits matter:
- Overlap seams by several inches so soil does not sneak through
- Cut clean openings around any plants you are keeping
- Pull the fabric flat and smooth, then pin it in place so there are no big wrinkles
Even with fabric, weeds can still show up from seeds that land on top. To keep them down:
- Sweep or blow leaves and dirt off the path now and then
- Pull or spot-treat any small weeds before they spread
- Add fresh gravel or DG as needed so sunlight cannot reach the soil
Create Base and Drainage Layers That Survive LA Rains
On top of the compacted soil or fabric, you will build your base layer. For most paths, that means several inches of compactible base rock, such as road base or Class II material. This rock has a mix of larger and finer pieces that lock together when compacted.
Key tips for a strong base:
- Spread base rock in thin layers, not all at once
- Compact each layer before adding the next
- Maintain your planned slope as you go
In Los Angeles, drainage is not about constant rain, it is about sudden storms that dump a lot of water very quickly. If your path is on a slope or near a house, extra drainage steps can help, such as:
- A French drain alongside a steep path to catch and move water
- More open-graded gravel in areas that need faster soaking into the ground
- Shallow swales to guide water away from doors, foundations, and patios
For paver or stone paths, finish your base with a thin bedding layer of sand or fine DG. This layer lets you set surfaces level while still keeping the overall slope so water runs off instead of pooling. Keep it even and avoid thick, soft spots that can shift later.
Set Surface Materials and Lock in the Edges
Now you finally see the fun part, the garden path materials on top. Whether you are laying pavers, stepping stones, or spreading gravel, the prepared base below does the heavy lifting.
As you set the surface:
- Keep joint gaps even so the pattern looks clean
- Check heights against lawns, patios, or door thresholds
- Use a long straightedge or board to spot high and low spots
Gravel and DG paths need enough depth to cover the base but not so much that your feet sink in. Paver and stone paths benefit from a final compaction over the surface, with sand swept into the joints.
Edges often get ignored, but they hold the whole path together. Strong edging keeps materials from slowly creeping into planting beds or out into the lawn when people walk, dogs run, or soil shifts a little. Good options include:
- Paver restraints along the sides of block or stone paths
- Metal or composite edging for gravel paths
- Mortared borders that tie into existing concrete or masonry
Since many DIY projects start in October, it helps to plan a simple finishing routine: give the path a light re-compaction or raking after a few weeks, once the base and surface have settled. After the first big rain, walk the route, look for puddles or movement, and top up any low spots. A quick check again in spring keeps everything tight, stable, and ready for year-round use.
A well-built base with compacted soil, smart weed barriers, and thoughtful drainage sets you up for a garden path that looks clean, handles LA weather, and stays low maintenance for years.
Get Started With Your Project Today
Explore our curated selection of garden path materials to find the right look and durability for your outdoor space. At Mr. Pavers, we will help you compare options so your path holds up beautifully to weather, foot traffic, and everyday use. If you would like guidance choosing products or planning your layout, contact us and we will walk you through the next steps.